What Is Vnc Rpi?
Ever wondered how you can control your Raspberry Pi remotely, seeing its screen and interacting with it as if you were sitting right in front of it? The answer lies in VNC (Virtual Network Computing) for your Raspberry Pi, a powerful tool unlocking the potential for effortless remote access and management. This technology transforms your Raspberry Pi into a remotely accessible device, allowing you to manage it from anywhere with an internet connection, or even within your local network.
The marriage of VNC and the Raspberry Pi is a match made in heaven for hobbyists, educators, and professionals alike. Think of it: a tiny, affordable computer that can be accessed and controlled from a laptop, tablet, or even a smartphone. This is particularly useful for projects where the Pi is located in an inaccessible or inconvenient location, such as a weather station on a roof, a home automation hub tucked away, or a media server hidden in a closet. Furthermore, VNC simplifies troubleshooting and maintenance, allowing you to diagnose and fix issues without physically interacting with the device. The best part? The setup is relatively straightforward, and the benefits are immense. It is the digital key to unlocking the full potential of your Raspberry Pi, enabling remote control, access to its desktop environment, and the ability to work on projects from anywhere. This setup gives you the power to tinker and manage your Raspberry Pi with ease, regardless of physical location.
| Aspect | Details | Additional Information |
|---|---|---|
| Purpose | Enables remote access and control of a Raspberry Pi. | Allows interaction with the Pi's desktop environment from another device. |
| Technology | Virtual Network Computing (VNC). | Uses a client-server model. |
| Key Features |
| Works across different operating systems. |
| Components |
| Server provides the desktop, client receives and displays it. |
| Applications |
| Ideal for headless setups (no monitor, keyboard, or mouse). |
| Benefits |
| Streamlines tasks and saves time. |
| Security Considerations |
| Protect the Pi from unauthorized access. |
| Setup Steps |
| Detailed instructions available online. |
| Common Software | RealVNC, TigerVNC, TightVNC | Open-source and commercial options available. |
| Troubleshooting | Check network connectivity, firewall settings, and server configuration. | Ensure the Pi and accessing device can communicate. |
| Use Cases |
| Various applications depending on your needs. |
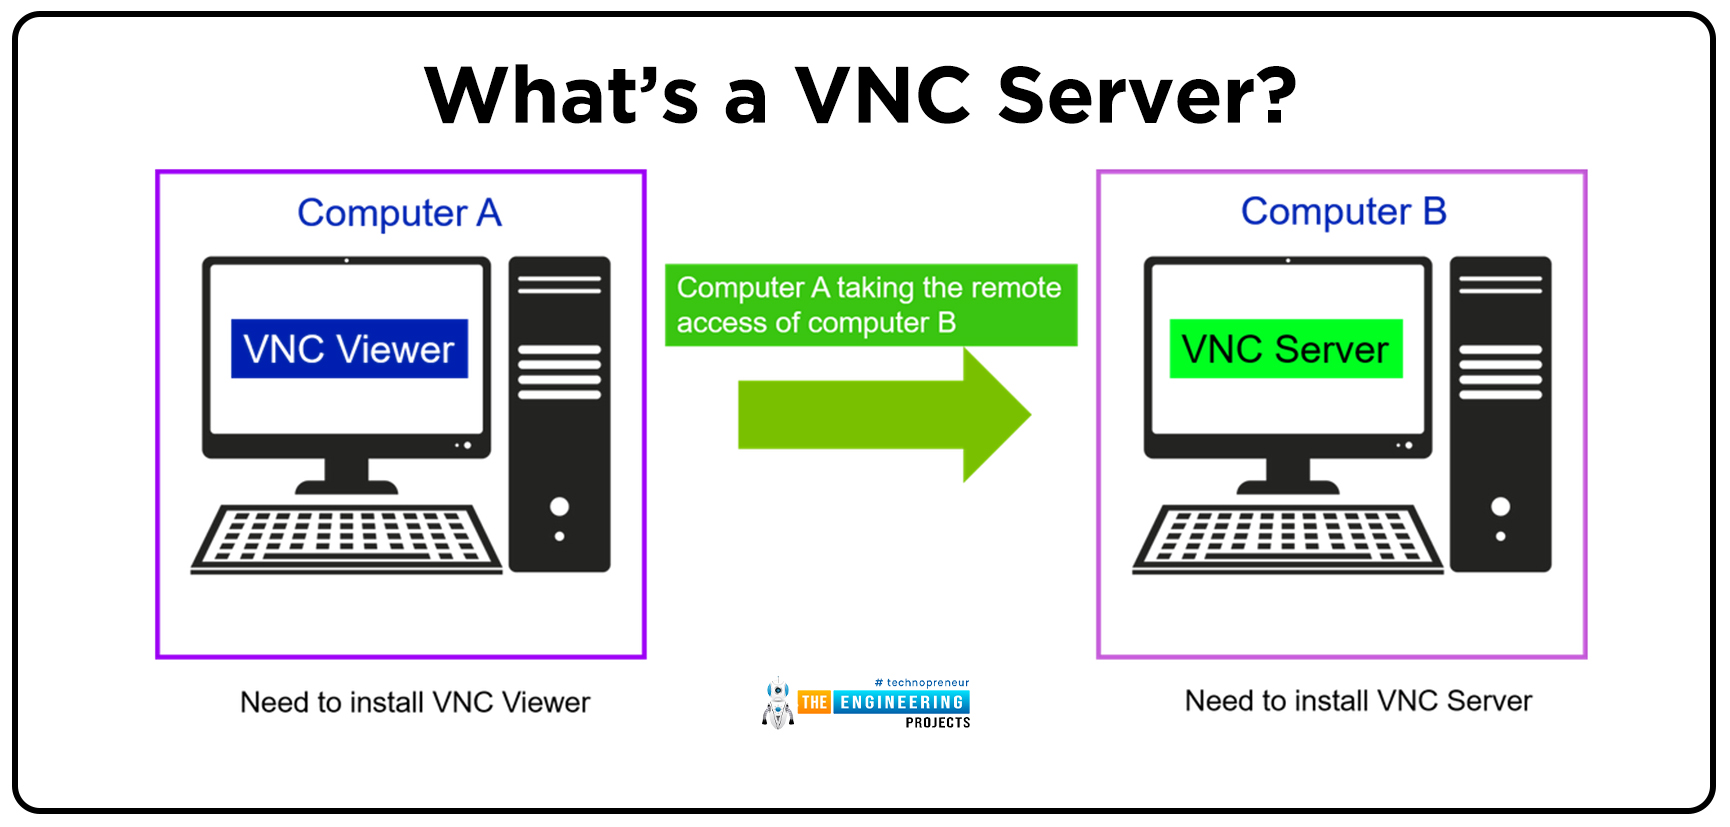
At its core, VNC provides a graphical desktop environment that you can access from another device, offering a window into your Raspberry Pi's operations. Think of it like a remote control for your Pi, allowing you to see and interact with its screen, keyboard, and mouse from afar. This opens up a world of possibilities, from managing headless servers to controlling projects from across the room, or even across the globe. No longer are you tethered to a monitor and keyboard; VNC grants you the freedom to remotely administer, configure, and enjoy your Raspberry Pi from anywhere you have an internet connection. This kind of remote access capability is extremely useful and flexible, catering to a wide range of users and projects.
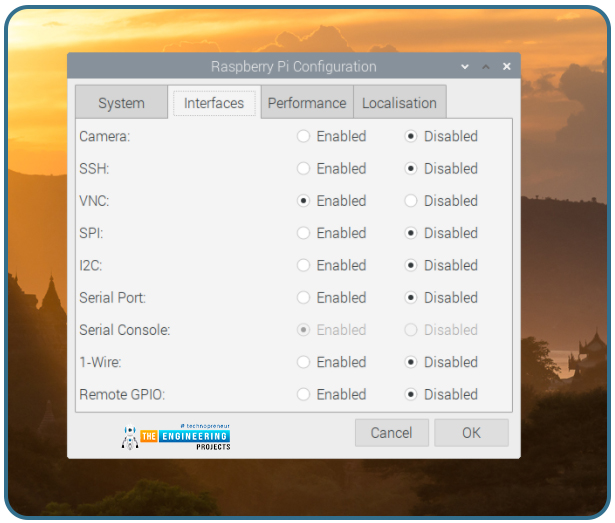
The journey of setting up VNC on your Raspberry Pi begins with the installation of a VNC server. Several options are available, each offering a slightly different set of features and performance characteristics. Popular choices include RealVNC, which offers a user-friendly interface and good performance, and TigerVNC, an open-source alternative favored by many for its flexibility. The selection of a server depends on individual needs and preferences, with each catering to slightly different use cases and performance requirements. Choosing the right server is crucial for the overall experience.
Once the server is installed, you'll configure it to your liking. This typically involves setting a password for access, choosing a resolution, and defining the display settings. Proper configuration is critical for a smooth and secure remote access experience. This step also typically involves setting up network configurations and security protocols to ensure a safe connection. Consider the specific use case and the security needs when configuring the server; this will enhance both the usability and security aspects of the remote setup.
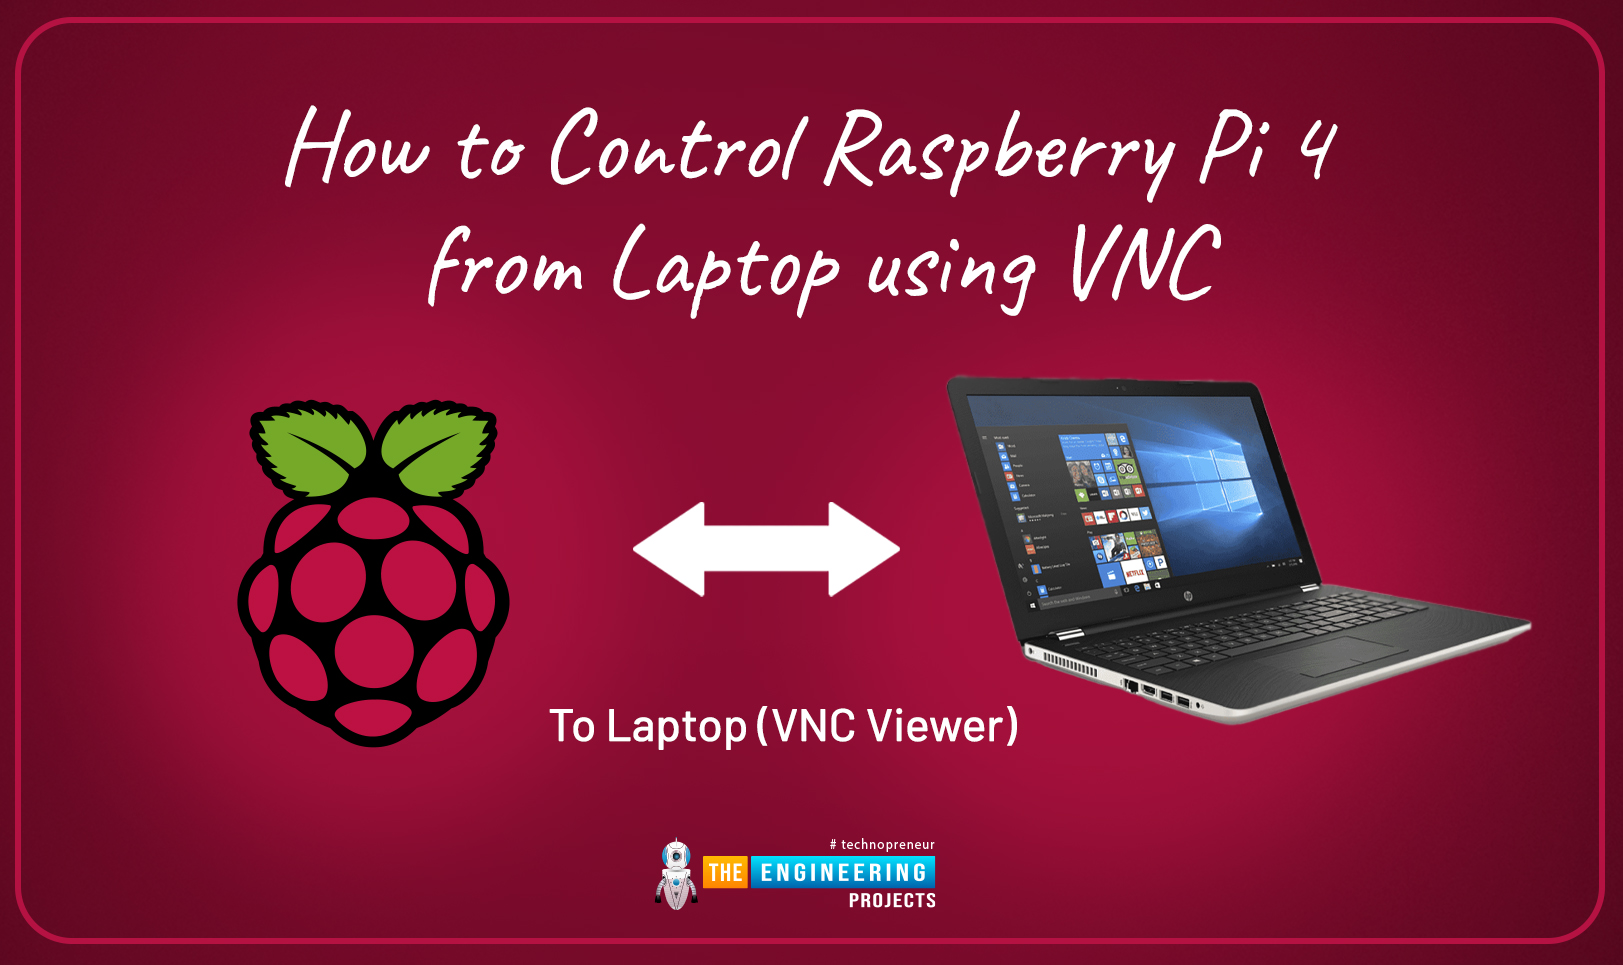
Following server setup, the next step involves installing a VNC client on the device from which you intend to access your Raspberry Pi. Most operating systems, including Windows, macOS, Linux, Android, and iOS, have available VNC client applications. These client applications serve as the gateway to your Raspberry Pi's desktop. Finding the right client depends on the operating system of the accessing device.
Connecting to your Raspberry Pi via VNC is typically straightforward. You'll need the Raspberry Pi's IP address and the VNC server's port number (usually 5900). Enter these details into your VNC client, and you'll be prompted for the password you set up earlier. Successful authentication grants you access to the Pi's desktop environment, giving you full control. This simple process is the final step in establishing a remote connection. This process brings the power of your Raspberry Pi to your fingertips, no matter your location.
The benefits of using VNC with your Raspberry Pi are numerous. Firstly, it greatly simplifies remote management. Whether you're troubleshooting a problem, installing software, or simply checking on the status of a project, VNC allows you to do it without physically interacting with the device. For projects located in hard-to-reach places, this is a game-changer. This alone makes it a significant advantage for many Raspberry Pi users.
Secondly, VNC offers incredible flexibility. With a VNC connection, you're no longer tied to a monitor, keyboard, and mouse. You can control your Raspberry Pi from your laptop, tablet, or smartphone, making it easy to work on projects or monitor your system from anywhere. This flexibility is perfect for those who value mobility and remote access. This flexibility provides users with the ability to take their Raspberry Pi projects anywhere, which is a great advantage in the modern world.
Thirdly, VNC can significantly reduce costs. By allowing you to access your Raspberry Pi remotely, you might be able to eliminate the need for a dedicated monitor, keyboard, and mouse. This is especially true for projects that run headless, where no direct display is required. This cost-saving aspect contributes to the affordability and accessibility of the Raspberry Pi ecosystem.
Beyond these core benefits, VNC unlocks numerous practical applications. Imagine setting up a home automation system, remotely controlling lights, thermostats, and other devices from your phone or laptop. You can also build a media server, accessing your movies, music, and other media from anywhere in the world. Moreover, VNC is a powerful tool for educational purposes. Teachers can monitor student projects remotely, providing assistance and guidance without being physically present at each workstation. This is a truly versatile technology.
When implementing VNC, security is of utmost importance. Always use a strong password to protect your VNC connection. Consider using encrypted connections to prevent eavesdropping on your data. Furthermore, it is crucial to keep your Raspberry Pi's operating system and VNC server updated with the latest security patches. Additional security measures include configuring firewalls to restrict access to your VNC server to only trusted devices or networks. These measures are essential for ensuring the safety and integrity of your Raspberry Pi.
For those venturing beyond their local networks, secure tunneling is critical. Using SSH (Secure Shell) to tunnel your VNC connection adds an extra layer of security by encrypting the traffic. SSH tunneling provides a secure channel through which your VNC traffic travels, preventing unauthorized access. Another key advantage of using SSH is that it allows you to bypass firewalls and access the Pi from behind a NAT (Network Address Translation) router.
Troubleshooting VNC connections can sometimes present challenges. If you're having trouble connecting, first check your network connectivity. Make sure the Raspberry Pi is connected to the network and has a valid IP address. Then, verify that your firewall is not blocking the VNC server's port (usually 5900). If the connection still fails, double-check the VNC server's configuration and ensure that the password is correct. Refer to online resources, such as forums and documentation, for additional troubleshooting tips and solutions. A systematic approach to troubleshooting will often reveal the source of the problem and allow you to establish a successful connection.
RealVNC, a popular and user-friendly option, offers a streamlined setup process and good performance. It comes with both a server for the Raspberry Pi and client applications for various operating systems. RealVNC's ease of use makes it a popular choice for beginners. The software is generally straightforward to install and configure, providing a seamless experience. This is a great place to start for those new to VNC.
TigerVNC is another widely used, open-source alternative, celebrated for its flexibility and customization options. It is a strong choice for users seeking greater control over their VNC setup. TigerVNC's open-source nature means that it is continually updated by the community. This makes it suitable for more advanced users who want granular control. It's a powerful and versatile choice, perfectly suited for a variety of applications.
When selecting a VNC server, it's important to consider your specific needs and technical proficiency. If ease of use is a priority, RealVNC is an excellent choice. If you have more advanced requirements, or prefer a more customizable solution, TigerVNC may be better suited. Evaluate your priorities and choose the VNC server that aligns best with them. This careful consideration helps to optimize the overall user experience.
Performance is an important aspect. VNC performance can depend on the network connection and the complexity of the graphical interface being transmitted. For optimal performance, connect your Raspberry Pi to your network via Ethernet rather than Wi-Fi. You might also consider reducing the screen resolution on the accessing device. Experimenting with these settings can help improve the overall responsiveness and smoothness of the remote connection, leading to a much more pleasurable experience. This ensures a smooth and enjoyable user experience.
VNC can be an indispensable tool in a wide array of projects. For home automation, you can use it to control lights, appliances, and other smart devices. As a remote server, you can access and manage files, applications, and system settings. For media centers, VNC allows remote access to your movies, music, and other media files. This can also be used for educational applications. The possibilities are vast, limited only by your creativity. These applications demonstrate the wide range of utility this remote-access technology offers.
In educational settings, VNC can be a valuable tool for remote teaching and collaboration. Teachers can monitor students' progress and offer assistance on projects remotely. Students can collaborate on projects remotely as well. This creates opportunities for remote learning and instruction. This enables educators and students to work together seamlessly, regardless of their physical locations. The flexibility that VNC provides can truly enhance the educational landscape.
In conclusion, VNC on a Raspberry Pi is a powerful, flexible, and accessible technology. It empowers users to remotely control and manage their devices from anywhere, opening up a world of possibilities. From home automation and media centers to education and server administration, the applications of VNC are vast and varied. By understanding the fundamentals of VNC, its setup, security considerations, and troubleshooting tips, users can unlock the full potential of their Raspberry Pi. Embrace the power of remote control and elevate your projects with VNC. This technology offers a significant enhancement to any Raspberry Pi project.

